1. Setting Root dan SSH
a. #sudo password root
lalu masukkan password root.
setelah itu login #su
#reboot
b. setting ip address client

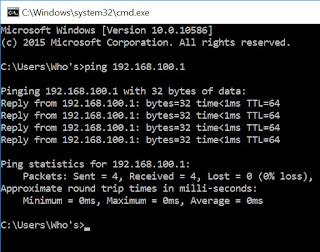
tes koneksi :
c. masuk putty

d. login

e. root@ns10:/home/hyd# pico /etc/ssh/sshd_config
# Package generated configuration file
# See the sshd_config(5) manpage for details
# What ports, IPs and protocols we listen for
#Port 22
Port 1734
# Use these options to restrict which interfaces/protocols sshd will bind to
#ListenAddress ::
#ListenAddress 0.0.0.0
ListenAddress ::
ListenAddress 0.0.0.0
....
....
# Authentication:
LoginGraceTime 120
#PermitRootLogin without-password
PermitRootLogin yes
StrictModes yes
e. lalu #reboot

2. Setting Router
a. root@ns10:# nano /etc/network/interfaces
....
....
# LAN Card pertama
auto p4p1
iface p4p1 inet static
address 172.16.3.1
netmask 255.255.255.128
network 172.16.3.0
broadcast 172.16.3.127
gateway 172.16.3.126
# LAN Card kedua
auto p4p2
iface p4p2 inet static
address 192.168.100.1
netmask 255.255.255.248
network 192.168.100.0
broadcast 192.168.100.7
b. #reboot
#ifconfig (cek ip nya)
c. root@ns10:# nano /etc/rc.local
#!/bin/sh -e
#
# rc.local
#
# This script is executed at the end of each multiuser runlevel.
# Make sure that the script will "exit 0" on success or any other
# value on error.
#
# In order to enable or disable this script just change the execution
# bits.
#
# By default this script does nothing.
iptables -t nat -A POSTROUTING -o p4p1 -j MASQUERADE
exit 0
d. root@ns10:# nano /etc/sysctl.conf
# Uncomment the next line to enable TCP/IP SYN cookies
# See http://lwn.net/Articles/277146/
# Note: This may impact IPv6 TCP sessions too
#net.ipv4.tcp_syncookies=1
# Uncomment the next line to enable packet forwarding for IPv4
net.ipv4.ip_forward=1 (hilangkan #)
# Uncomment the next line to enable packet forwarding for IPv6
# Enabling this option disables Stateless Address Autoconfiguration
# based on Router Advertisements for this host
#net.ipv6.conf.all.forwarding=1
f. root@ns10:# pico /etc/resolv.conf
nameserver 192.168.100.1
nameserver 172.16.3.126
nameserver 8.8.4.4
g. #reboot
h. setting ip client


3. Setting DNS Server
a. root@ns10:~# cd /etc/bind/
b. root@ns10:/etc/bind# named.conf.default-zones
(copy scrip dari named.conf.default-zones )
root@ns10:/etc/bind# pico named.conf.local
zone “sekolah10.web.id" {
type master;
file "/etc/bind/db.sekolah10";
};
zone "100.168.192.in-addr.arpa" {
type master;
file "/etc/bind/db.192";
};
c. root@ns10:/etc/bind# cp db.local db.sekolah10
root@ns10:/etc/bind# cp db.127 db.192
root@ns10:/etc/bind# pico db.sekolah10

d. root@ns10:/etc/bind# pico db.192

e. root@ns10:/etc/bind# pico named.conf.options
options {
directory "/var/cache/bind";
// If there is a firewall between you and nameservers you want
// to talk to, you may need to fix the firewall to allow multiple
// ports to talk. See http://www.kb.cert.org/vuls/id/800113
forwarders {
192.168.100.1;
10.109.22.2;
};
allow-query { any; };
//===================================================================
// If BIND logs error messages about the root key being expired,
// you will need to update your keys. See https://www.isc.org/bind-keys
//===================================================================
//dnssec-validation auto;
auth-nxdomain no; # conform to RFC1035
listen-on-v6 { any; };
};
f. root@ns10:/etc/bind# /etc/init.d/bind9 restart
g. root@ns10:/etc/bind# pico /etc/resolv.conf
nameserver 192.168.100.1
nameserver 172.16.3.126
h. root@ns10:/etc/bind# named-checkconf named.conf.local
root@ns10:/etc/bind# named-checkconf named.conf.options
root@ns1:/etc/bind# named-checkconf -z
zone sekolah1.web.id/IN: loaded serial 2
zone 100.168.192.in-addr.arpa/IN: loaded serial 1
zone localhost/IN: loaded serial 2
zone 127.in-addr.arpa/IN: loaded serial 1
zone 0.in-addr.arpa/IN: loaded serial 1
zone 255.in-addr.arpa/IN: loaded serial 1
i. root@ns10:/etc/bind# nslookup sekolah1.web.id
Server: 192.168.100.1
Address: 192.168.100.1#53
Name: sekolah1.web.id
Address: 192.168.100.1
root@ns10:/etc/bind# nslookup www.sekolah1.web.id
Server: 192.168.100.1
Address: 192.168.100.1#53
www.sekolah1.web.id canonical name = sekolah1.web.id.
Name: sekolah1.web.id
Address: 192.168.100.1
root@ns10:/etc/bind# nslookup student.sekolah1.web.id
Server: 192.168.100.1
Address: 192.168.100.1#53
student.sekolah1.web.id canonical name = sekolah1.web.id.
Name: sekolah1.web.id
Address: 192.168.100.1
j. pada client


4. Setting Web Server
root@ns10:/etc/bind# cd /var/www/html/
root@ns10:/var/www/html# mkdir sekolah10
root@ns10:/var/www/html# mkdir student
root@ns10:/var/www/html# ls
index.html sekolah1 student
root@ns10:/var/www/html# pico sekolah1/index.html
sekolah1.web.id
root@ns10:/var/www/html# pico student/index.html
student.sekolah1.web.id
root@ns10:/var/www/html# cd /etc/apache2/sites-available/
root@ns10:/etc/apache2/sites-available# ls
000-default.conf default-ssl.conf
root@ns10:/etc/apache2/sites-available# cp 000-default.conf sekolah1.conf
root@ns10:/etc/apache2/sites-available# cp 000-default.conf student.conf
root@ns10:/etc/apache2/sites-available# pico sekolah10.conf
<VirtualHost *:80>
# The ServerName directive sets the request scheme, hostname and port that
# the server uses to identify itself. This is used when creating
# redirection URLs. In the context of virtual hosts, the ServerName
# specifies what hostname must appear in the request's Host: header to
# match this virtual host. For the default virtual host (this file) this
# value is not decisive as it is used as a last resort host regardless.
# However, you must set it for any further virtual host explicitly.
ServerAdmin nia@sekolah10.web.id
ServerName sekolah10.web.id
ServerAlias www.sekolah1.web.id
DocumentRoot /var/www/html/sekolah10
# Available loglevels: trace8, ..., trace1, debug, info, notice, warn,
# error, crit, alert, emerg.
# It is also possible to configure the loglevel for particular
# modules, e.g.
#LogLevel info ssl:warn
ErrorLog ${APACHE_LOG_DIR}/error.log
CustomLog ${APACHE_LOG_DIR}/access.log combined
# For most configuration files from conf-available/, which are
# enabled or disabled at a global level, it is possible to
# include a line for only one particular virtual host. For example the
# following line enables the CGI configuration for this host only
# after it has been globally disabled with "a2disconf".
#Include conf-available/serve-cgi-bin.conf
</VirtualHost>
# vim: syntax=apache ts=4 sw=4 sts=4 sr noet
root@ns10:/etc/apache2/sites-available# pico student.conf
<VirtualHost *:80>
# The ServerName directive sets the request scheme, hostname and port that
# the server uses to identify itself. This is used when creating
# redirection URLs. In the context of virtual hosts, the ServerName
# specifies what hostname must appear in the request's Host: header to
# match this virtual host. For the default virtual host (this file) this
# value is not decisive as it is used as a last resort host regardless.
# However, you must set it for any further virtual host explicitly.
ServerAdmin nia@student.sekolah10.web.id
ServerName student.sekolah10.web.id
ServerAlias student.sekolah10.web.id
DocumentRoot /var/www/html/student
# Available loglevels: trace8, ..., trace1, debug, info, notice, warn,
# error, crit, alert, emerg.
# It is also possible to configure the loglevel for particular
# modules, e.g.
#LogLevel info ssl:warn
ErrorLog ${APACHE_LOG_DIR}/error.log
CustomLog ${APACHE_LOG_DIR}/access.log combined
# For most configuration files from conf-available/, which are
# enabled or disabled at a global level, it is possible to
# include a line for only one particular virtual host. For example the
# following line enables the CGI configuration for this host only
# after it has been globally disabled with "a2disconf".
#Include conf-available/serve-cgi-bin.conf
</VirtualHost>
# vim: syntax=apache ts=4 sw=4 sts=4 sr noet
root@ns1:/etc/apache2/sites-available# a2ensite sekolah1.conf
Enabling site sekolah10.
To activate the new configuration, you need to run:
service apache2 reload
root@ns1:/etc/apache2/sites-available# a2ensite student.conf
Enabling site student.
To activate the new configuration, you need to run:
service apache2 reload
root@ns1:/etc/apache2/sites-available# service apache2 reload

 5. Install CMS Wordpress
.Membuat database dan user baru untuk wordpress.
Sebelum anda menginstall wordpress di server ubuntu 14.04, anda memerlukan database untuk menyimpan dan mengelola data-data situs anda nantinya. Anda bisa membuat database dan user baru melalui phpmyadmin. Namun, jika anda belum install phpmyadmin di ubuntu 14.04 anda, silahkan anda buat database MySQL secara manual melalui terminal console dengan mengikuti langkah-langkah berikut ini :
a. root@ns10:# mysql -u root -p
Enter password:
Welcome to the MySQL monitor. Commands end with ; or \g.
Your MySQL connection id is 36
Server version: 5.5.44-0ubuntu0.14.04.1 (Ubuntu)
Copyright (c) 2000, 2015, Oracle and/or its affiliates. All rights reserved.
Oracle is a registered trademark of Oracle Corporation and/or its
affiliates. Other names may be trademarks of their respective
owners.
Type 'help;' or '\h' for help. Type '\c' to clear the current input statement.
mysql>
mysql> CREATE DATABASE wprstudent;
Query OK, 1 row affected (0.09 sec)
mysql> CREATE USER hyd@localhost IDENTIFIED BY 'passwordhyd';
Query OK, 0 rows affected (0.00 sec)
mysql> GRANT ALL PRIVILEGES ON wprstudent.* TO hyd@localhost;
Query OK, 0 rows affected (0.00 sec)
mysql> FLUSH PRIVILEGES;
Query OK, 0 rows affected (0.00 sec)
mysql> exit
Bye
root@ns10:~#
b. root@ns10:# cd /var/www/html
root@ns10:/var/www/html# wget http://wordpress.org/latest.tar.gz
root@ns10:/var/www/html# tar -zxvf latest.tar.gz
root@ns10:/var/www/html# cd wordpress/
root@ns10:/var/www/html/wordpress# cp wp-config-sample.php wp-config.php
root@ns10:/var/www/html/wordpress# pico wp-config.php
(cari scrip berikut) :
// ** MySQL settings - You can get this info from your web host ** //
/** The name of the database for WordPress */
define('DB_NAME', 'wprstudent');
/** MySQL database username */
define('DB_USER', 'nia');
/** MySQL database password */
define('DB_PASSWORD', 'passwordnia');
c. root@ns10:/var/www/html/wordpress# rsync -avP /var/www/html/wordpress/ /var/www/html/student/
root@ns10:/var/www/html/wordpress# cd ../student/
root@ns10:/var/www/html/student# rm index.html
root@ns10:/var/www/html/student# adduser student
Adding user `student' ...
Adding new group `student' (1001) ...
Adding new user `student' (1001) with group `student' ...
Creating home directory `/home/student' ...
Copying files from `/etc/skel' ...
Enter new UNIX password: (ini di isi)
Retype new UNIX password: (ini di isi)
passwd: password updated successfully
Changing the user information for student
Enter the new value, or press ENTER for the default
Full Name []:
Room Number []:
Work Phone []:
Home Phone []:
Other []:
Is the information correct? [Y/n] y
d. root@ns10:/var/www/html/student# gpasswd -a student sudo
Adding user student to group sudo
root@ns10:/var/www/html/student# chown -R student:www-data *
root@ns10:/var/www/html/student# mkdir wp-content/uploads
root@ns10:/var/www/html/student# chown -R :www-data wp-content/uploads

>>>>>>>>>>>>>>>>>>>>>>>>>>>>>>>>>>SELESAI<<<<<<<<<<<<<<<<<<<<<<<<<<<<<<<
>>>>>>>>SEMOGA BERMANFAAT :-) SEMANGATTT......!!!!!!!!!!!!!!!!UPK'2016<<<<<<<<<<
a. #sudo password root
lalu masukkan password root.
setelah itu login #su
#reboot
b. setting ip address client

tes koneksi :

c. masuk putty

d. login

e. root@ns10:/home/hyd# pico /etc/ssh/sshd_config
# Package generated configuration file
# See the sshd_config(5) manpage for details
# What ports, IPs and protocols we listen for
#Port 22
Port 1734
# Use these options to restrict which interfaces/protocols sshd will bind to
#ListenAddress ::
#ListenAddress 0.0.0.0
ListenAddress ::
ListenAddress 0.0.0.0
....
....
# Authentication:
LoginGraceTime 120
#PermitRootLogin without-password
PermitRootLogin yes
StrictModes yes
e. lalu #reboot

2. Setting Router
a. root@ns10:# nano /etc/network/interfaces
....
....
# LAN Card pertama
auto p4p1
iface p4p1 inet static
address 172.16.3.1
netmask 255.255.255.128
network 172.16.3.0
broadcast 172.16.3.127
gateway 172.16.3.126
# LAN Card kedua
auto p4p2
iface p4p2 inet static
address 192.168.100.1
netmask 255.255.255.248
network 192.168.100.0
broadcast 192.168.100.7
b. #reboot
#ifconfig (cek ip nya)
c. root@ns10:# nano /etc/rc.local
#!/bin/sh -e
#
# rc.local
#
# This script is executed at the end of each multiuser runlevel.
# Make sure that the script will "exit 0" on success or any other
# value on error.
#
# In order to enable or disable this script just change the execution
# bits.
#
# By default this script does nothing.
iptables -t nat -A POSTROUTING -o p4p1 -j MASQUERADE
exit 0
d. root@ns10:# nano /etc/sysctl.conf
# Uncomment the next line to enable TCP/IP SYN cookies
# See http://lwn.net/Articles/277146/
# Note: This may impact IPv6 TCP sessions too
#net.ipv4.tcp_syncookies=1
# Uncomment the next line to enable packet forwarding for IPv4
net.ipv4.ip_forward=1 (hilangkan #)
# Uncomment the next line to enable packet forwarding for IPv6
# Enabling this option disables Stateless Address Autoconfiguration
# based on Router Advertisements for this host
#net.ipv6.conf.all.forwarding=1
f. root@ns10:# pico /etc/resolv.conf
nameserver 192.168.100.1
nameserver 172.16.3.126
nameserver 8.8.4.4
g. #reboot
h. setting ip client


3. Setting DNS Server
a. root@ns10:~# cd /etc/bind/
b. root@ns10:/etc/bind# named.conf.default-zones
(copy scrip dari named.conf.default-zones )
root@ns10:/etc/bind# pico named.conf.local
zone “sekolah10.web.id" {
type master;
file "/etc/bind/db.sekolah10";
};
zone "100.168.192.in-addr.arpa" {
type master;
file "/etc/bind/db.192";
};
c. root@ns10:/etc/bind# cp db.local db.sekolah10
root@ns10:/etc/bind# cp db.127 db.192
root@ns10:/etc/bind# pico db.sekolah10

d. root@ns10:/etc/bind# pico db.192

e. root@ns10:/etc/bind# pico named.conf.options
options {
directory "/var/cache/bind";
// If there is a firewall between you and nameservers you want
// to talk to, you may need to fix the firewall to allow multiple
// ports to talk. See http://www.kb.cert.org/vuls/id/800113
forwarders {
192.168.100.1;
10.109.22.2;
};
allow-query { any; };
//===================================================================
// If BIND logs error messages about the root key being expired,
// you will need to update your keys. See https://www.isc.org/bind-keys
//===================================================================
//dnssec-validation auto;
auth-nxdomain no; # conform to RFC1035
listen-on-v6 { any; };
};
f. root@ns10:/etc/bind# /etc/init.d/bind9 restart
g. root@ns10:/etc/bind# pico /etc/resolv.conf
nameserver 192.168.100.1
nameserver 172.16.3.126
h. root@ns10:/etc/bind# named-checkconf named.conf.local
root@ns10:/etc/bind# named-checkconf named.conf.options
root@ns1:/etc/bind# named-checkconf -z
zone sekolah1.web.id/IN: loaded serial 2
zone 100.168.192.in-addr.arpa/IN: loaded serial 1
zone localhost/IN: loaded serial 2
zone 127.in-addr.arpa/IN: loaded serial 1
zone 0.in-addr.arpa/IN: loaded serial 1
zone 255.in-addr.arpa/IN: loaded serial 1
i. root@ns10:/etc/bind# nslookup sekolah1.web.id
Server: 192.168.100.1
Address: 192.168.100.1#53
Name: sekolah1.web.id
Address: 192.168.100.1
root@ns10:/etc/bind# nslookup www.sekolah1.web.id
Server: 192.168.100.1
Address: 192.168.100.1#53
www.sekolah1.web.id canonical name = sekolah1.web.id.
Name: sekolah1.web.id
Address: 192.168.100.1
root@ns10:/etc/bind# nslookup student.sekolah1.web.id
Server: 192.168.100.1
Address: 192.168.100.1#53
student.sekolah1.web.id canonical name = sekolah1.web.id.
Name: sekolah1.web.id
Address: 192.168.100.1
j. pada client


4. Setting Web Server
root@ns10:/etc/bind# cd /var/www/html/
root@ns10:/var/www/html# mkdir sekolah10
root@ns10:/var/www/html# mkdir student
root@ns10:/var/www/html# ls
index.html sekolah1 student
root@ns10:/var/www/html# pico sekolah1/index.html
sekolah1.web.id
root@ns10:/var/www/html# pico student/index.html
student.sekolah1.web.id
root@ns10:/var/www/html# cd /etc/apache2/sites-available/
root@ns10:/etc/apache2/sites-available# ls
000-default.conf default-ssl.conf
root@ns10:/etc/apache2/sites-available# cp 000-default.conf sekolah1.conf
root@ns10:/etc/apache2/sites-available# cp 000-default.conf student.conf
root@ns10:/etc/apache2/sites-available# pico sekolah10.conf
<VirtualHost *:80>
# The ServerName directive sets the request scheme, hostname and port that
# the server uses to identify itself. This is used when creating
# redirection URLs. In the context of virtual hosts, the ServerName
# specifies what hostname must appear in the request's Host: header to
# match this virtual host. For the default virtual host (this file) this
# value is not decisive as it is used as a last resort host regardless.
# However, you must set it for any further virtual host explicitly.
ServerAdmin nia@sekolah10.web.id
ServerName sekolah10.web.id
ServerAlias www.sekolah1.web.id
DocumentRoot /var/www/html/sekolah10
# Available loglevels: trace8, ..., trace1, debug, info, notice, warn,
# error, crit, alert, emerg.
# It is also possible to configure the loglevel for particular
# modules, e.g.
#LogLevel info ssl:warn
ErrorLog ${APACHE_LOG_DIR}/error.log
CustomLog ${APACHE_LOG_DIR}/access.log combined
# For most configuration files from conf-available/, which are
# enabled or disabled at a global level, it is possible to
# include a line for only one particular virtual host. For example the
# following line enables the CGI configuration for this host only
# after it has been globally disabled with "a2disconf".
#Include conf-available/serve-cgi-bin.conf
</VirtualHost>
# vim: syntax=apache ts=4 sw=4 sts=4 sr noet
root@ns10:/etc/apache2/sites-available# pico student.conf
<VirtualHost *:80>
# The ServerName directive sets the request scheme, hostname and port that
# the server uses to identify itself. This is used when creating
# redirection URLs. In the context of virtual hosts, the ServerName
# specifies what hostname must appear in the request's Host: header to
# match this virtual host. For the default virtual host (this file) this
# value is not decisive as it is used as a last resort host regardless.
# However, you must set it for any further virtual host explicitly.
ServerAdmin nia@student.sekolah10.web.id
ServerName student.sekolah10.web.id
ServerAlias student.sekolah10.web.id
DocumentRoot /var/www/html/student
# Available loglevels: trace8, ..., trace1, debug, info, notice, warn,
# error, crit, alert, emerg.
# It is also possible to configure the loglevel for particular
# modules, e.g.
#LogLevel info ssl:warn
ErrorLog ${APACHE_LOG_DIR}/error.log
CustomLog ${APACHE_LOG_DIR}/access.log combined
# For most configuration files from conf-available/, which are
# enabled or disabled at a global level, it is possible to
# include a line for only one particular virtual host. For example the
# following line enables the CGI configuration for this host only
# after it has been globally disabled with "a2disconf".
#Include conf-available/serve-cgi-bin.conf
</VirtualHost>
# vim: syntax=apache ts=4 sw=4 sts=4 sr noet
root@ns1:/etc/apache2/sites-available# a2ensite sekolah1.conf
Enabling site sekolah10.
To activate the new configuration, you need to run:
service apache2 reload
root@ns1:/etc/apache2/sites-available# a2ensite student.conf
Enabling site student.
To activate the new configuration, you need to run:
service apache2 reload
root@ns1:/etc/apache2/sites-available# service apache2 reload

.Membuat database dan user baru untuk wordpress.
Sebelum anda menginstall wordpress di server ubuntu 14.04, anda memerlukan database untuk menyimpan dan mengelola data-data situs anda nantinya. Anda bisa membuat database dan user baru melalui phpmyadmin. Namun, jika anda belum install phpmyadmin di ubuntu 14.04 anda, silahkan anda buat database MySQL secara manual melalui terminal console dengan mengikuti langkah-langkah berikut ini :
a. root@ns10:# mysql -u root -p
Enter password:
Welcome to the MySQL monitor. Commands end with ; or \g.
Your MySQL connection id is 36
Server version: 5.5.44-0ubuntu0.14.04.1 (Ubuntu)
Copyright (c) 2000, 2015, Oracle and/or its affiliates. All rights reserved.
Oracle is a registered trademark of Oracle Corporation and/or its
affiliates. Other names may be trademarks of their respective
owners.
Type 'help;' or '\h' for help. Type '\c' to clear the current input statement.
mysql>
mysql> CREATE DATABASE wprstudent;
Query OK, 1 row affected (0.09 sec)
mysql> CREATE USER hyd@localhost IDENTIFIED BY 'passwordhyd';
Query OK, 0 rows affected (0.00 sec)
mysql> GRANT ALL PRIVILEGES ON wprstudent.* TO hyd@localhost;
Query OK, 0 rows affected (0.00 sec)
mysql> FLUSH PRIVILEGES;
Query OK, 0 rows affected (0.00 sec)
mysql> exit
Bye
root@ns10:~#
b. root@ns10:# cd /var/www/html
root@ns10:/var/www/html# wget http://wordpress.org/latest.tar.gz
root@ns10:/var/www/html# tar -zxvf latest.tar.gz
root@ns10:/var/www/html# cd wordpress/
root@ns10:/var/www/html/wordpress# cp wp-config-sample.php wp-config.php
root@ns10:/var/www/html/wordpress# pico wp-config.php
(cari scrip berikut) :
// ** MySQL settings - You can get this info from your web host ** //
/** The name of the database for WordPress */
define('DB_NAME', 'wprstudent');
/** MySQL database username */
define('DB_USER', 'nia');
/** MySQL database password */
define('DB_PASSWORD', 'passwordnia');
c. root@ns10:/var/www/html/wordpress# rsync -avP /var/www/html/wordpress/ /var/www/html/student/
root@ns10:/var/www/html/wordpress# cd ../student/
root@ns10:/var/www/html/student# rm index.html
root@ns10:/var/www/html/student# adduser student
Adding user `student' ...
Adding new group `student' (1001) ...
Adding new user `student' (1001) with group `student' ...
Creating home directory `/home/student' ...
Copying files from `/etc/skel' ...
Enter new UNIX password: (ini di isi)
Retype new UNIX password: (ini di isi)
passwd: password updated successfully
Changing the user information for student
Enter the new value, or press ENTER for the default
Full Name []:
Room Number []:
Work Phone []:
Home Phone []:
Other []:
Is the information correct? [Y/n] y
d. root@ns10:/var/www/html/student# gpasswd -a student sudo
Adding user student to group sudo
root@ns10:/var/www/html/student# chown -R student:www-data *
root@ns10:/var/www/html/student# mkdir wp-content/uploads
root@ns10:/var/www/html/student# chown -R :www-data wp-content/uploads

>>>>>>>>>>>>>>>>>>>>>>>>>>>>>>>>>>SELESAI<<<<<<<<<<<<<<<<<<<<<<<<<<<<<<<
>>>>>>>>SEMOGA BERMANFAAT :-) SEMANGATTT......!!!!!!!!!!!!!!!!UPK'2016<<<<<<<<<<
Konfigurasi UbuntuServer14.40.3